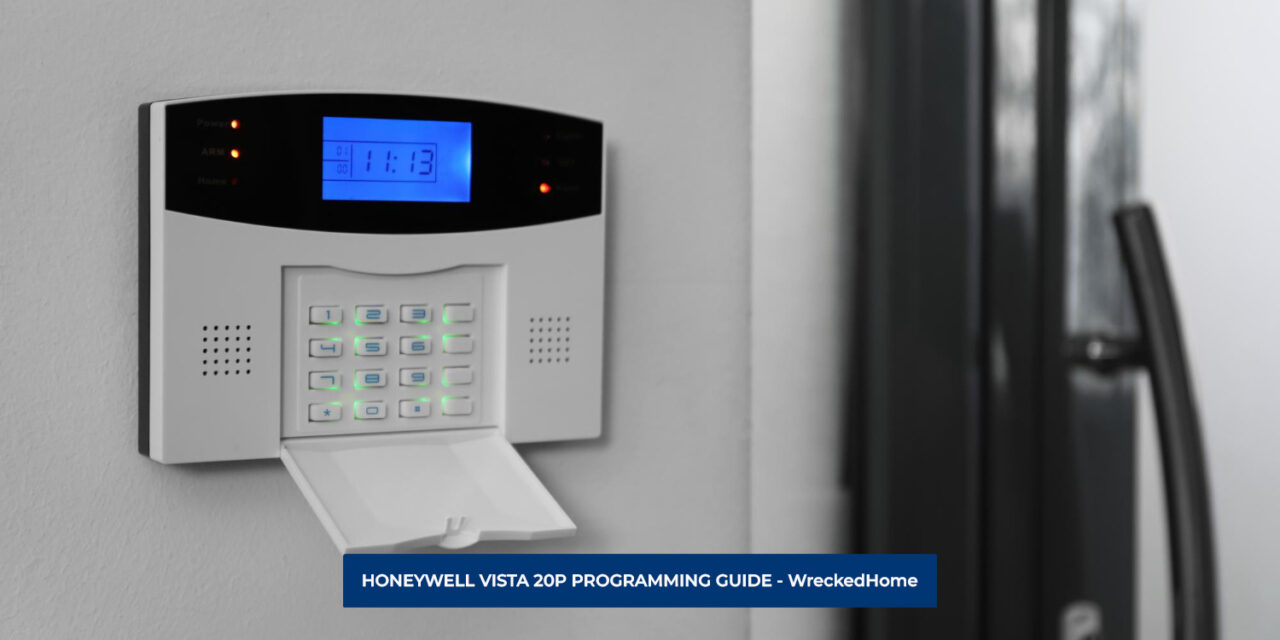
The Honeywell Vista 20P security system stands as a stout defender that digitally guards homes and businesses. A robust integration of cutting-edge technology and reliable functionality, the vista 20p programming ensures advanced security. In essence, it is not merely a system; it is a comprehensive security solution that requires a nuanced understanding of its programming guide.
This guide serves as the compass for users to meet unique security needs, ensuring it functions seamlessly as an extension of one’s safety strategy. Imagine having a powerful tool at your disposal but not knowing how to harness its capabilities.
Don’t worry, in this article we explore the significance of “Vista 20P programming”. It’s not just about configuring codes and zones; it’s about mastering the intricacies within the programming guide. Let’s start this journey where security meets personalization, and knowledge becomes the anchor of a protected environment.
- Honeywell Vista 20p Programming Security System
- HONEYWELL VISTA 20 Installation Process
- Changing Your Honeywell Alarm Code: A Step-by-Step Guide
- Resetting the Installer Code: Best Practices (Vista 20p Programming)
- Verification of Code Changes: Ensuring Security
- Managing User Codes: Assign, Change, or Delete (Vista 20P Programming)
- Best Practices and Tips: Maximizing Efficiency
- Conclusion (Honeywell Vista 20P Programming)
- FAQs (Honeywell Vista 20P Programming)
Honeywell Vista 20p Programming Security System
With Honeywell Vista 20P Security System reveals a sophisticated array of security measures, from versatile zone configurations to advanced communication options. The system’s prowess lies in its adaptability which meets the required security needs with finesse.
Proper programming emerges as the backbone for harnessing its factory defaults. Delving into the programming process serves as an invaluable lesson in the fundamentals of Honeywell programming. With proper knowledge and skills, it empowers users to make customized changes across the entire spectrum of the security system in your door entry.
Crucially, distinguishing between default settings and personalized programming is a starting point, a template waiting to be refined. Through careful programming, users can tailor the system to their unique requirements, to ensure the strategic use. It’s a transition from a generic security setup to a tailor-made solution that transcends the immediate changes and imparts a foundational understanding of the system’s intricacies.
HONEYWELL VISTA 20 Installation Process
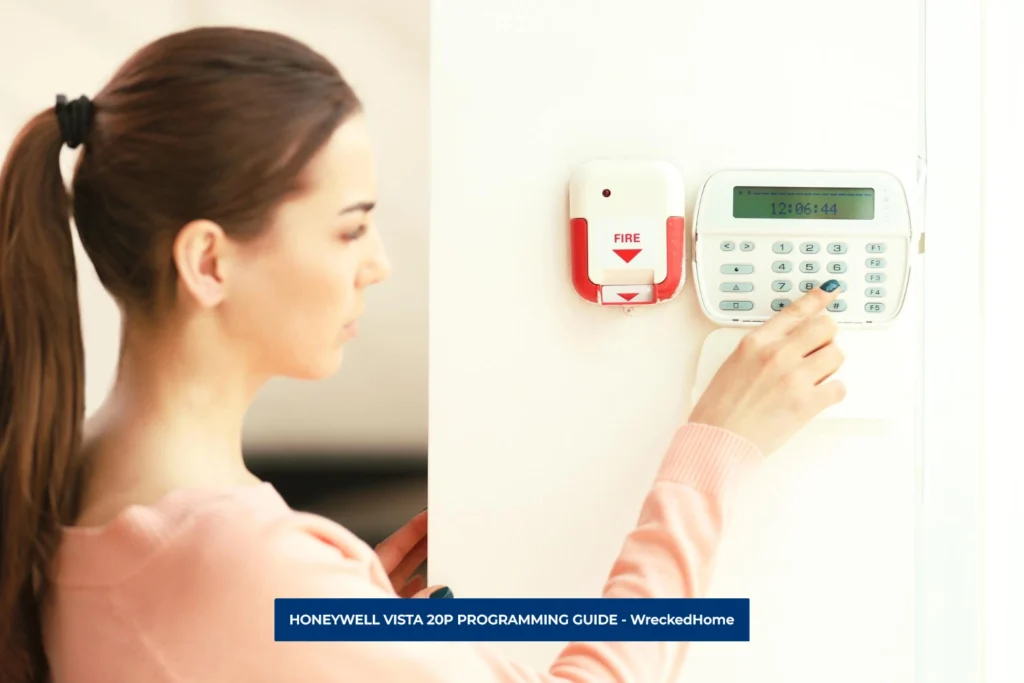
Installing the Honeywell vista 20p programming system is not an easy task for everyone. But with proper skills a user can get a robust and personalized security setup. Follow these comprehensive steps to ensure a smooth and effective installation.
- Planning and Preparation: Before diving into the installation, you need to understand your property’s layout. Identify key areas for sensor placement that you want to add in your security like windows, doors or a balcony. Ensure all necessary components; including sensors, keypads, and the control panel, are working properly.
- Mounting the Control Panel: Choose a central location for the control panel, especially the main area that’s used for entry and exit. Mount it securely on a wall with the help of a Screwdriver and screws, but keep it easy to access for programming and maintenance.
- Wiring: Carefully run the wiring from the control panel to the various sensors and keypads. You can follow the manual for proper instructions to protect the wires and maintain a neat appearance.
- Power Connection: Connect the control panel to a stable power source that ensures proper working of Honeywell Vista 20P. As an electric backup try to use UPS or alternative power source to ensure functionality during power outages.
- Zone Wiring: Wire the sensors to their designated zones on the control panel according to required security. Different zones can be programmed according to the level of security easily. Ensure that each sensor is properly connected, and double-check the wiring so that you can enjoy security without a hindrance.
- Keypad Installation: During installation mount keypads in strategic locations, especially near main entry points. Connect them to the control panel with the help of wires. Ensure the proper access so you can control the security.
- Programming User Codes: Enter the Honeywell Vista 20P programming mode on the keypad and set up user codes for arming, disarming, and accessing the system. Assign unique codes to individuals that make it easy for residents’ recognition.
- Sensor Testing: Before finalizing the installation, run a sensor test to ensure proper functionality to verify the alarm system responds appropriately.
- System Configuration: Enter the system configuration menu and customize settings to meet specific security needs.
- Integration with Monitoring Services: If desired, integrate the Honeywell Vista 20P with a monitoring service enable the system to send alerts in case of emergencies.
- Final Testing: Conduct a comprehensive system test to verify the response time of monitoring services if applicable.
- User Training: Provide comprehensive training to end-users to familiarize with arming, disarming, and responding to alarm events.
- Documentation: You need to have a record document of the installation, including the location of sensors, wiring diagrams, and user codes. It will ease the future troubleshooting.
By following these steps with precision and attention it is easy to get a customized and reliable security solution.
Changing Your Honeywell Alarm Code: A Step-by-Step Guide
When it comes to resetting your Honeywell alarm code, you need to access it with some basic steps. These are important vista 20p programming steps. The process for resetting a Honeywell alarm code varies according to alarm and model. You can access it with these general steps for your Honeywell Vista 20p Programming:
- Input the default or existing master code.
- Press “8” on the keypad.
- Press “2” on the keypad.
- Enter the new four-digit code.
- Re-enter the new code.
- Wait for the confirming beep, signaling the successful reset.
For other Honeywell systems, especially those with touchscreens, there is another easy going way. From the primary screen, tap on security, tools, and master code and choose that option to “EDIT” for required change.
Resetting the Installer Code: Best Practices (Vista 20p Programming)
If you want to reset your installer code then just follow these steps for a Vista 20p programming system:
- Power cut the transformer and battery.
- The again reconnect the transformer and battery.
- Now activate the alarm.
- Press “*” and “#” simultaneously within 30 seconds of the reboot, there will display “Installer 20.”
- Enter “*20.”
- Input a new favorite and secure four-digit code and listen for the confirming beep.
- Type in *99 to exit.
Now everything is done accurately.
Verification of Code Changes: Ensuring Security
After altering the code on your Honeywell Alarm, it’s crucial to verify that your new code is working properly. For verification of code in the keypad system, follow these steps for Vista 20p programming:
- Input the new four-digit installer code.
- Type in “800.”
- Confirm the successful update when there is a display reads “Installer 20.”
- Type “*99” to exit.
Managing User Codes: Assign, Change, or Delete (Vista 20P Programming)
Enhance the security of your system by assigning unique user codes; you can do it with unique alarm. For keypads, the process for Vista 20p programming is as follows:
- Input the master code.
- Press “8.”
- Choose a number from 3 to 33 for the user code then press that chosen digit on your keypad.
- Enter a four-digit code.
- Listen it carefully for the confirming beep.
To change a user code, repeat the process with the new four-digit code and wait for the confirmation beep.
Verification of code functionality involves typing it in and pressing “1” to disarm to operates seamlessly by following these comprehensive steps for code management.
Best Practices and Tips: Maximizing Efficiency
To achieve the best results and high end security, it is essential to familiarize yourself with the intricacies of the security landscape and prepare to plan a customized symphony of security. Here are basic tips to follow for high performance that ensures the integrity of transmitted data.
1. Embrace the Rhythm of Regular Updates:
Firmware and software updates serve in staying attuned to the beat of regular updates is paramount. Regularly check for updates to ensure your Honeywell vista 20p programming is the harmonious prelude to a secure and optimized environment.
2. Harmonize Optimal Configurations:
In the symphony of security configurations, sharing best practices is essential for optimal configurations that resonate with their unique needs. Advice on sensor placement, not only safeguards but also operates at the peak of its efficacy.
3. Unlock the Melody of Security Enhancements:
The vista 20p programming offers a rich repertoire of advanced security features. Users can elevate their security to a level of sophistication that resonates with their distinct needs.
4. Conduct a Comprehensive Security Score:
Like a maestro conducting an intricate score, periodically assess the overall security such as user code strength or the effectiveness of alarm verification. This holistic approach provides users a harmonious defense against potential threats.
5. Fine-tune the Crescendo of User Education:
The final crescendo in the symphony of security is understanding the significance of updates, and maximizing the potential of security enhancements. By fine-tuning user knowledge, you can enhance the effectiveness of the system but also contribute to the overall resilience of the security posture.
Conclusion (Honeywell Vista 20P Programming)
From the foundational basics of accessing programming mode to the advanced nuances of optimizing configurations, there is symphony of customization within this Honeywell Vista 20p security system. Regular updates serve as the dynamic rhythm to add depth and complexity, creating a border of defense that adapts to specific requirements. By conducting a comprehensive security score, users are empowered to play a pivotal role in the ongoing performance of their security.
Embracing security enhancements becomes the conductor’s baton, turning each user into a virtuoso in the grand symphony of personalized security.
If you still cannot program your thermostat after this guide, please hire a professional. Find A Pro Near You Here!
FAQs (Honeywell Vista 20P Programming)
What is the programming code for the Honeywell Vista 20P?
The default installer code for the Honeywell Vista-20P is 4112 that you can access by press and hold the * and # keys within 50 seconds.
How many codes does a Vista 20P have?
The vista 20p programming and 21iP support a total of 49 user codes that provide enhanced security to your home and business.
What is the Honeywell recovery mode?
In the context of a HVAC system, Honeywell’s recovery mode signifies to resume operation and restore the desired temperature setting in an efficient manner.


