Learning how to install a 3 way switch is a DIY electrical project can be a bit more complex because we need to control the lights from two different locations with an outlet as well. However, the outlet wiring diagram can make things easier. Because this is confusing, we’ll teach you how to install a 3 way switch with the outlet wiring diagram. It’s going to be fun learning experience. So let’s jump into it and see how we can make installation a breeze.
Before starting, it is worth mentioning that all electrical DIY projects should be done with full confidence about the whole procedure, so if you’re unsure about even one single step then don’t take the risk. Let’s get Started!
- Materials You'll Need
- How to install a switch with an outlet wiring diagram
- Turn off the power
- Plan the wiring layout
- Install Electrical Boxes
- Run the cables
- Connect wires in the first box
- Connect wires in the second box
- Connect the Outlet
- Wiring checks
- Turn on the power
- Safety gear
- Difference between a 3 way dimmer switch and a 3-way switch
- Conclusion
Materials You’ll Need
The first thing you should do when installing a 3 way dimmer switch with the help of an outlet wiring diagram is gather your materials. Below, you will find the necessary materials needed to get the job done.
- Outlet Wiring Diagram
- Two 3-way switches
- An outlet
- Electrical boxes and cover plates
- NM electrical cable, typically 14/3 or 12/3 gauge
- Wire nuts
- Wire strippers
- Screwdrivers
- Electrical tape
How to install a switch with an outlet wiring diagram
After you make sure you have all the tools and materials to install the switch then you can start the next steps. So we’ll go in a step-by-step process as it’ll be easy for you to navigate and follow through. Remember to have your outlet wiring diagram handy so that you don’t miss a step!
Turn off the power
As you are looking at the outlet wiring diagram for guidance, the first step is turning off the power in the area where you’ll be installing the switch. You can trip the breaker or get the fuse out but make sure that there is no current in the circuit. Use a voltage meter to confirm this. If it’s not available, you can also use a tester. This is the most important step.
Plan the wiring layout
Next, you have to plan the layout, which means you have to know where the wires and terminal are going to be connected. Determine the spot for the two switches and the outlet. Mark the positions where you’ll install the electrical boxes for each device, make sure they are at a certain height, and align it with the room’s layout.
Install Electrical Boxes
Install electrical boxes at those marked out points for the outlet and two switches. Make sure they are securely fitted to the wall or structure. First, cut the wall where you’re going to install the boxes and make sure they have a good space to organize those boxes.
Now insert the electrical boxes into the space and ensure that the boxes are level with the wall surface and are not popping out of it. You can use screws or mounting brackets that come with the boxes.
Within each electrical box, you’ll find mounting tabs or brackets for attaching the 3-way switches. Position these tabs or brackets as per the manufacturer’s instructions. Make sure the switches will align properly with the box cover plate.
Run the cables
You’ll need a special kind of cable for this job called an NM cable. When you look at the outlet wiring diagram, you run these in all of the places where a wire is present. There are wire two sizes to pick from. These options are the 12/2 or 14/2. The size you choose depends on the strength of the electrical current in your wires, your local laws will tell you which one to use. It’s like picking a hose for your garden and you want the right size to handle the water flow.
Once you have the cable, it’s important to make sure it stays in place and doesn’t flop around. You can do this by using something called cable staples or straps.
Visit our store for 10% off our Save Home Energy products here.
Connect wires in the first box
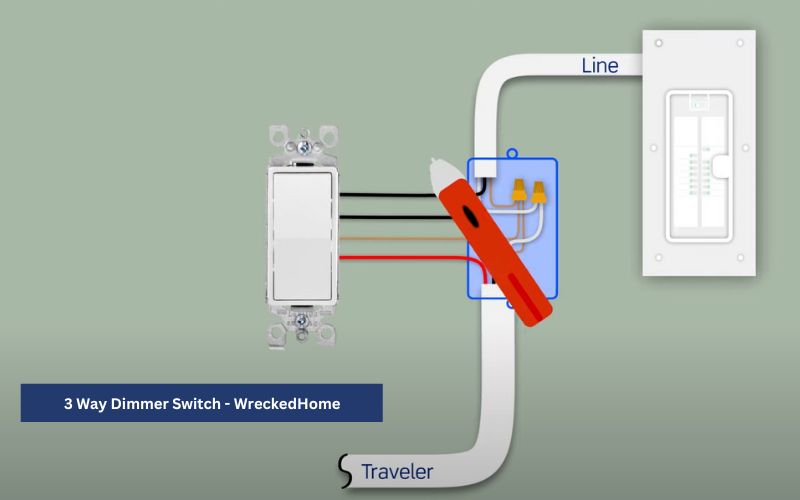
Inside the first switch box, you’ll see three sets of wires according to the outlet wiring diagram. Each set has three wires such as a black one, a white one, and a bare or green one. These wires are like the threads of a sewing kit, and we’re going to connect them together to make everything work smoothly.
The black wire from the cable that comes from the electrical panel is very important because it carries the electricity. You’ll need to connect this black wire to a special screw on the first 3-way switch. This screw is usually dark-colored and is called the common screw.
Next, you’ll need to connect white wires with each other using wire nuts to hold them together. Then Connect all these ground wires together and attach them to a screw or terminal inside the switch box that’s especially for grounding. That’s it with the first box.
Connect wires in the second box
Now, let’s talk about connecting wires in the second switch box. Inside this box, you’ll find three sets of wires, just like before. One from the first switch, one going to the outlet, and one for the light or device that you want to control.
In the second switch box, you will connect the black wire from the cable coming from the first switch to the common screw terminal on the second 3-way switch. The black wire from the cable heading to the outlet connects to one of the remaining screw terminals on the second switch, and the black wire from the cable leading to the light or device connects to the other remaining screw terminal on the second switch.
This determines how the light or device is controlled. As in the first box, you will also connect all the white wires together using a wire nut and connect all the ground wires together and to the switch box if it’s metal.
Connect the Outlet
Now, we’re going to talk about how to connect the electrical outlet. This part of the outlet wiring diagram brings everything together. That’s where you can plug in things like lamps, chargers, and other devices. Inside the outlet box, there are two sets of wires. One set comes from the first switch box, and the other goes towards the electrical panel. Each set has three wires.
Connect the black wire to one of the screws on the outlet that’s usually a shiny brass color. These screws are often marked as hot. This is how the outlet gets its electricity to share with your devices. Then you need to Connect the white wire to a different screw on the outlet that’s usually silver in color.
These screws are often marked as neutral. Lastly, you have to do something about the ground wires also. Just Connect all these ground wires together and attach them to a special green screw on the outlet.
Wiring checks
Now it’s time to make sure everything is perfect and connected securely. Take a look at the outlets and switches. Are they properly installed inside the electrical boxes? Are they straight and secure? Ensure that everything is in the right place and not loose or too tight.
By performing these checks, you’re making sure that all your hard work in connecting those colorful wires is correct and safe. If something doesn’t look right or you’re unsure about anything, it’ll be very good to ask a professional electrician.
Turn on the power
This is the moment where you have followed every part of the outlet wiring diagram. You are now done. You’ll feel very happy and curious at this point. So turn the power on and start the test. To test your 3-way switches, you should be able to turn the light on and off from both switches independently. If it’s a combination switch and outlet, make sure the outlet has power and can supply electricity.
To test a combination switch and outlet Plug in a device or something like a lamp into the outlet. If the device power’s on, that’s a good sign. It means the outlet is working and can provide electricity to your devices, just like plugging in your phone to charge it.
Safety gear
Wearing safety gear is super important when you’re doing electrical work. This is a step that is not seen in the outlet wiring diagram. As you know, safety comes first so you have to dress like a real electrician and then start installing the switch or whatever you’re going to do. Use gloves, eyeglasses, and rubber shoes while working with electricity.
Let me tell you something, if you wear this protective equipment you’ll feel confident and there are more chances of success with your DIY project. This is because you’ll feel confident and you will not be afraid of trying and playing with those wires. Right?
Keep in mind even if you’re just checking the voltages in the circuit, you should wear gloves as it’s our responsibility to take care of ourselves and try to avoid any potential hazards. No matter if the work is simple or complex you should wear safety gear.
Difference between a 3 way dimmer switch and a 3-way switch
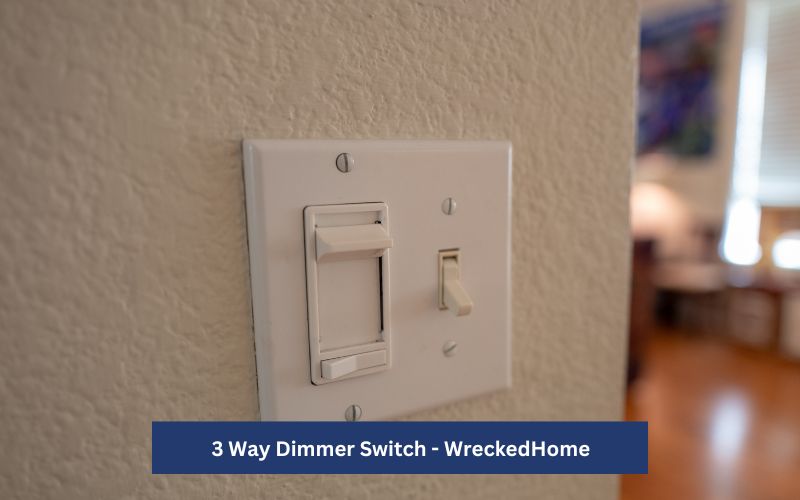
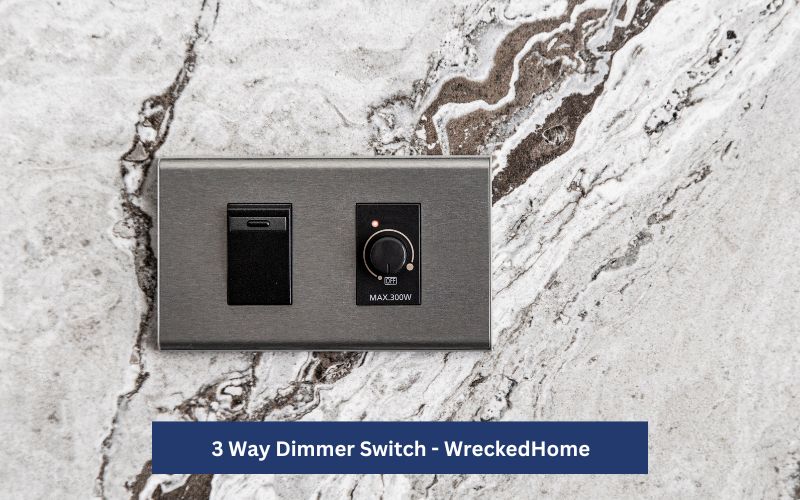
A 3 way dimmer switch is like a control panel for lights, it allows you to turn them on or off from multiple locations, similar to having two doors in one room. On the other hand, a 3 way dimmer switch is a bit more advanced, as it not only lets you control lights from different spots but also adjusts their brightness, so you can have different atmospheres and moods in your space, such as bright for tasks or dim for relaxation. So, the outlet wiring diagram will be similar for both switches. However, it is not the exact same.
Conclusion
After reading this detailed article you might be able to install a 3 way dimmer switch by yourself with the help of the outlet wiring diagram. However, there are some that are not completely confident. If you’re unsure about any of the steps then stop and call a professional. If you are a DIY lover then try different things, because I believe electrical DIYs are more complicated and dangerous than all of the others.
In the end, a 3 way dimmer switch is a great piece or element to add some kind of functionality to your home, but if you want better controls and more functions you can also look for 3 way dimmer switch.
Well, that’s it. I hope you have learned something new and you’ll try it, but remember to wear you safety gear and take the necessary precautions.
For any repairs, installations, builds, or questions; We recommend you to hire a professional. Find A Pro Near You Here!

