A 3 way dimmer switch is a convenient and very useful element out there. It allows you to control the intensity of light or brightness with ease. It results in a better life span of lights with less energy consumption.
Especially if you have those large rooms and halls then it’s a must have. There are many remote 3 way dimmer switches that allow you to control through your smartphone. So, it’s getting more and more interesting. In this guide, we’ll see how to wire a 3 way dimmer properly.
Keep that in mind, the wiring and installation of 3-way dimmer switches can be more complex than standard switches, especially if you’re replacing an existing switch or installing a dimmer in an area that wasn’t previously wired for it. I’m not asking you to get afraid of it but just a friendly reminder.
Let’s get on to it.
What’s a 3 way dimmer switch and how it is different from others
I think it’s important to know what it is and how it is different from other kinds of switches. Am I right? So basically, A 3 way dimmer switch or you can also call it just 3 way dimmer as most people say, It’s a light switch that is used to control the brightness of multiple lights from multiple places.
Let me give you an example. You have a nice study lamp and you want to control it from the front door and backdoor as well. What you can do now is just install two 3 way dimmer switches, one at the front door and the other one at the back door to control the lamp light easily. Don’t ask me why someone is going to do that.
If you got the idea let’s move forward.
The ability to control the levels with the on-and-off functionality separates this dimmer from others. Unlike single-pole switches, 3-way dimmers can be controlled from multiple locations. For example, in a large living room, you can have a couple of 3-way dimmer switches one at the entrance and another near to the sofa so you can control the lights freely.
Safety precautions
Before starting a Diy wiring, make sure to follow some safety steps to avoid any kind of mishaps or sudden accidents. No doubt electricity is not a good friend so get your safety gear on and before taking any step make sure to learn how to do things first. Even if you’re not an electrician, you can do this, but safety is a priority.
1. The first and most important step is to turn off the power. My friend calls electricity a hidden beast that we can’t see but it’s always there. You can trip the circuit breaker or remove the fuse if needed. Trip the right breaker or remove the fuse that operates the lights you’re fixing.
It should not happen that you are working in the bedroom and turn off the breaker for the dining room, be cautious about that.
2. Next use a voltage detector to double check if there is current leaking or not. There are also two types of voltages DC and AC, You have to check AC. You can easily learn how to use a voltage detector by watching a simple tutorial on YouTube. Now If it beeps or lights up, there’s still power. If not, you’re good to go.
3. Put the gears on and be a real electrician like Apollo from NYC. All you need is rubber-soled shoes to insulate from the ground, eye protection glasses to avoid getting those sparks in your eyes, and rubber gloves. That’s it.
4. Have you ever seen a cat playing in the water? Hmm, Maybe not. The same goes here. Make sure your workspace is dry and free from moisture or any kind of wet stuff.
5. I have another saying from my Buddy, He says wires are like plates of spaghetti but not for the diner. These can really mess your mind and sometimes you don’t know what’s going on there. So it’s important to look for the right wires that you’re going to work with.
When you’re dealing with the wires, it’s a smart idea to keep things organized. One handy way to do this is to always use labels or different colored tape to know about each wire. Not only does it make your job easier, but it also makes it easy to reconnect everything correctly.
6. If you’re a complete newbie then I would suggest avoiding shortcuts, even if you know everything. In DIY it’s a good experience to try some shortcuts but not with the electricity. You may get a manual with the dimmer, make sure to also read it carefully.
Now you’re good to go.
Things to know about 3 way dimmer switch
Okay, so a 3-way dimmer switch comes in different sizes, but don’t worry, it’s not super complicated. These switches are designed to fit in the same places where regular light switches can go, so they’re not huge or anything like that. They have almost the same height and width as a standard switch, which is around 4.5 inches tall and 2.75 inches wide.
Then we have got a 3-way dimmer switch based on watts, it’s important that it can handle the total wattage of the lights you want to dim. There are 600 watts, 800 watts, and 1000 watts 3 way dimmer switches so choose accordingly.
The 3 way dimmer switch can also be used for ceiling fans and other outdoor applications as well. Nowadays we also have digital switches which is not a huge surprise or thing to say wow for but they are more useful and good looking than the rotatory and slide dimmers.
Visit our store for 10% off our Save Home Energy products here.
Do I need special wiring for 3 way dimmer switches
If you already have two standard 3-way switches then you can replace one of them with a 3-way dimmer switch that is usually doable without any special wiring. These switches typically have three wires: a hot wire, a traveler wire, and a load wire
However, some 3-way dimmer switches might require an extra wire called a neutral wire and that’s where things could get a bit more complex. If you don’t want to take a risk it’s better to get help from an experienced electrician like Apollo.
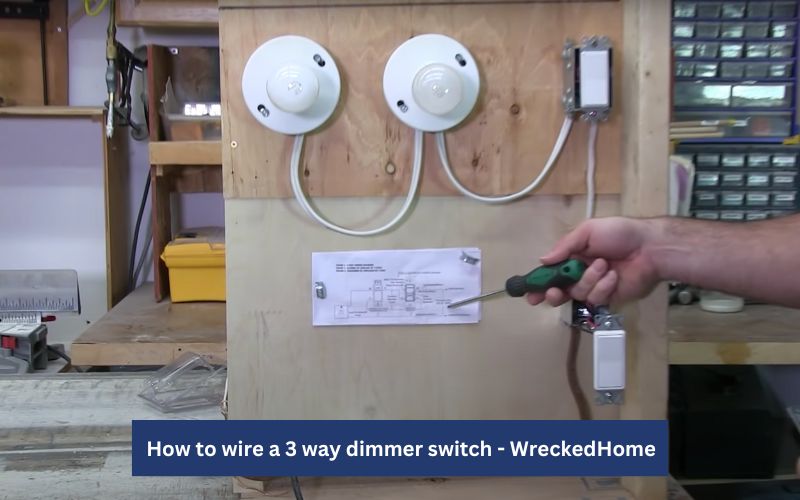
3 way dimmer switch wiring diagram
I know it’s been a long class but it’s important to talk about every aspect. Now let’s see how to wire a 3 way dimmer switch.
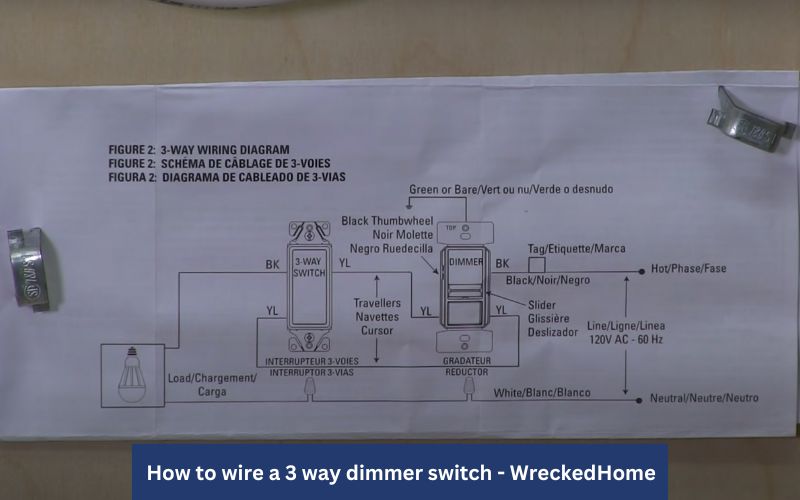
The first step is to identify the wires correctly. As you know there are three wires such as black the hot one, red the traveler, and green the ground wire. Next, you need to connect the dimmer’s wire with the wires inside of the electrical box in the wall. Keep in mind you need to connect corresponding wires with each other, like green with the green, red with red, and black with the black.
If your dimmer switch has a white or gray wire, It means that it requires a neutral wire. If your electrical box contains a neutral wire then you know what to do, connect them with each other and make sure to use wire nuts to hold them together.
It’s always recommended to start with the ground wire as it’s a good practice. Your dimmer may come with the terminals and screws. The procedure is a little different for that.
Connect the black or red wire from the dimmer with the common terminal which provides power. The green wire is going to be connected to the ground terminal. After securing the ground and hot wires, attach the dimmer wires to their corresponding traveler terminals.
Once all connections are completed, carefully tuck the wires and dimmer switch back into the electrical box. Turn the power on, and test the dimmer by adjusting the brightness. If it works as expected, you’ve made it.
Keep this in mind, don’t tie the wire nuts too hard as it can damage the wires and that’s a big trouble. So be careful with that.
Well, that’s how you can install a 3 way dimmer switch. I tried to keep things simple and easy but the process can’t be changed and you have to go through every step with great attention and care.
3-way dimmers on a 4-way circuit. Is it possible
The straight answer is yes. You can use a 3 way dimmer switch on a 4-way circuit. You can replace one of the 3 way switches with the dimmer switch.
Conclusion
In the end, it’s going to be fun with some good experiments as well. I would say wiring a 3 way dimmer switch is a bit complex process but with the proper guidance and knowledge, you can do that easily. If you’re unsure about anything please give it a fair shot and get help from an electrician.
One more thing, Before buying the dimmer switch make sure it’s compatible with your lights and bulbs. As you probably know different dimmer switches are designed for specific types of bulbs some for incandescent and others for LCD lights. So using the wrong one can cause flickering or other issues as well. That’s it.
For any repairs, installations, builds, or questions; We recommend you to hire a professional. Find A Pro Near You Here!


